

Elementor is the most widely used page builder for WooCommerce stores, and stores built with it have specific technical characteristics that affect how an affiliate program integrates. The checkout flow may be customized, the page templates are controlled by Elementor rather than your theme, and pages created in Elementor behave differently from standard WordPress posts and pages in ways that matter for affiliate registration form embedding and affiliate tracking reliability.
None of these differences are obstacles — they simply require that you know about them and handle them correctly during setup. An affiliate program on an Elementor store configured properly works identically to one on any other WooCommerce store. The purpose of this guide is to be specific about the Elementor steps so you do not spend time troubleshooting problems that have straightforward solutions once you know what to look for.
This guide covers the complete setup of an affiliate program on an Elementor WooCommerce store using Affiliate Engine, a WooCommerce affiliate program plugin with dedicated Elementor widget support — including form embedding, program page design, tracking verification, and the Elementor-specific settings that affect each step.
How Elementor affects affiliate program setup — the three differences that matter
Most affiliate program setup guides are written for generic WordPress or WooCommerce stores and assume the default block editor or classic editor. Elementor changes three specific things about the setup process that you need to handle explicitly:
On a standard WordPress page, you embed the affiliate registration form by adding a shortcode to a Shortcode block or directly in the content area. On an Elementor page, the shortcode method still works — you use an Elementor HTML widget — but Affiliate Engine also provides a dedicated Elementor widget for the registration form, which integrates more naturally with Elementor’s layout system. The widget method is the preferred approach for Elementor users because it respects Elementor’s column and section structure, making it easier to position the form correctly alongside your page content.
Elementor Pro includes a WooCommerce checkout widget and a checkout page template feature. If you have replaced the default WooCommerce checkout page with an Elementor-designed page, the order completion hook that affiliate tracking plugins use may fire on a different template than expected. This is specifically a concern if you used Elementor’s “Display Conditions” to assign a custom template to the WooCommerce checkout page. The fix is straightforward: ensure the Elementor checkout template still uses the standard WooCommerce checkout shortcode or block, which preserves the hook firing correctly.
Your affiliate program landing page — the page that explains the program, shows commission rates, and contains the registration form — benefits from being built in Elementor since you can design it to match your store’s aesthetic precisely. Elementor’s column layouts, typography controls, icon boxes, and animation features let you create a page that looks like a natural extension of your store design rather than a generic WordPress page with a form in it. This visual consistency matters for conversion: affiliates who visit a program page that looks professionally designed are more likely to apply than those who land on an obviously default-styled page.
Step 1: Install and configure Affiliate Engine
Install and activate Affiliate Engine from the WordPress plugin directory or by uploading the plugin zip file. Elementor does not interfere with plugin activation, and no special installation steps are required for an Elementor store. Once active, configure the core program settings before building any pages — the pages need to exist before you can point settings to them.

In the Affiliate Engine general settings, configure your referral URL parameter name, cookie lifetime, and commission settings. Pay particular attention to whether your store uses Elementor’s page caching features (available in Elementor Hosting or through Elementor-compatible caching plugins like WP Rocket or LiteSpeed Cache). If caching is active, enable the AJAX-based cookie setting option in Affiliate Engine — this ensures the affiliate tracking cookie is set via JavaScript after the cached page loads, bypassing any caching that might otherwise prevent the cookie from being written on the first page visit through a referral link.
Also confirm which page your WooCommerce “Thank You” page uses. In some Elementor Pro setups, the order received page has been given a custom Elementor template via Display Conditions. If this is the case, verify the template still uses the standard WooCommerce order received shortcode — this is the page where the order completion event fires and where affiliate referral attribution is recorded. A custom Elementor template that replaces the WooCommerce shortcode with custom content will break tracking for orders from that page forward.
Step 2: Create the affiliate program page in Elementor
Create a new WordPress page for your affiliate program and open it in the Elementor editor. This is where the Elementor advantage becomes concrete: you can design the page visually, with your store’s fonts, colors, and layout system, creating a program page that looks like a natural extension of your store rather than a generic WordPress page.
Use a two-column Elementor section for the page hero. Left column: your headline (commission rate prominently stated), two to three sentences describing how the program works, and three icon boxes highlighting key benefits (commission rate, payout schedule, cookie duration). Right column: a product image or lifestyle image that represents your brand. This layout communicates the program’s value proposition in under 30 seconds of reading, which is the window you have before a visitor decides whether to continue to the form.
Use Elementor’s Icon Box or Timeline widgets to create a simple three-step visual: Apply and get approved → Share your unique link and coupon code → Earn commission on every sale you refer. This visual sequence answers the most common visitor question (“what exactly do I have to do?”) in a scannable format that requires minimal reading. Keep each step to a single sentence.
Below the value proposition and how-it-works sections, place a full-width section containing the Affiliate Engine registration form widget. Search “Affiliate” or “Affiliate Engine” in the Elementor widget panel — the registration form widget appears in the Affiliate Engine widget category. Drag it into the section. The widget renders the registration form directly in the Elementor canvas, with your custom fields and approval mode already configured from the plugin settings. Style the section background and padding to frame the form clearly.
Set the page URL slug to something clean — /affiliate-program or /affiliates — in the WordPress page settings before publishing. The URL matters for SEO and for sharing in recruitment communications. Elementor does not change how WordPress page slugs work, so this is configured in the standard WordPress URL settings panel (the same gear icon in the WordPress page editor before you open Elementor, or in the WordPress posts list).
Using the Affiliate Engine Elementor widget: step by step
The Affiliate Engine Elementor widget is a dedicated widget that appears in the Elementor editor once both plugins are active. It is distinct from using a shortcode in an HTML widget — the dedicated widget integrates with Elementor’s styling system and updates visually as you configure it.
Navigate to the affiliate program page in WordPress Pages and click “Edit with Elementor.” If you created the page in the WordPress block editor, you can still open it with Elementor — Elementor will manage the full-page layout from this point.
In the Elementor widget panel on the left, type “affiliate” in the search box. The Affiliate Engine registration form widget appears in the search results. If it does not appear, verify both plugins are active and the Elementor cache has been cleared (Elementor → Tools → Regenerate CSS & Data).
Drag the registration form widget into the section you have designated for the form. The form renders immediately in the Elementor canvas showing the fields you configured in the plugin settings. Switch to Preview mode (the eye icon at the bottom of Elementor) to see exactly how it will appear to visitors.
Use Elementor’s Section → Style options to set the background color, padding, and border radius for the form section. Apply the same fonts used across your store (set via Elementor’s Global Fonts if you have configured them). The form itself inherits WooCommerce form styling, but the section framing is fully within Elementor’s control.
Publish the page and open it in a new private browser window where you are not logged in as admin. Fill in the form and submit it. Verify the confirmation message appears correctly, then check the WordPress admin Requests tab to confirm the test application arrived. This test confirms the widget is connected to the plugin correctly and that the approval workflow is functioning.
Affiliate tracking on Elementor checkout pages
If your WooCommerce store uses Elementor Pro’s checkout template features, you need to verify that the affiliate tracking is working correctly through your specific checkout flow. The most reliable way to do this is a complete end-to-end test before approving any real affiliates.

If you have replaced the WooCommerce order-received page with an Elementor template that does not include the WooCommerce order received shortcode, tracking will not fire correctly. The solution is to add an HTML widget to the Elementor order-received template that contains the WooCommerce order received shortcode, which re-enables the hook. Alternatively, remove the Display Condition that applies the custom template to the order-received page and let WooCommerce handle that page with its default template.
For stores using CartFlows or FunnelKit alongside Elementor, run the complete test below before launching the program. These funnel builder plugins use their own order completion flows that sometimes process the WooCommerce order completion event asynchronously — the test will confirm whether affiliate attribution is recording correctly in your specific configuration.
Configuring the affiliate dashboard page for Elementor stores
The affiliate dashboard lives inside the WooCommerce My Account area — it does not require a separate page in Elementor. However, if you have customized your My Account page using Elementor Pro’s WooCommerce Builder or a third-party Elementor WooCommerce extension, verify that the My Account area still renders the standard WooCommerce My Account tabs, including the Affiliate Engine tab.
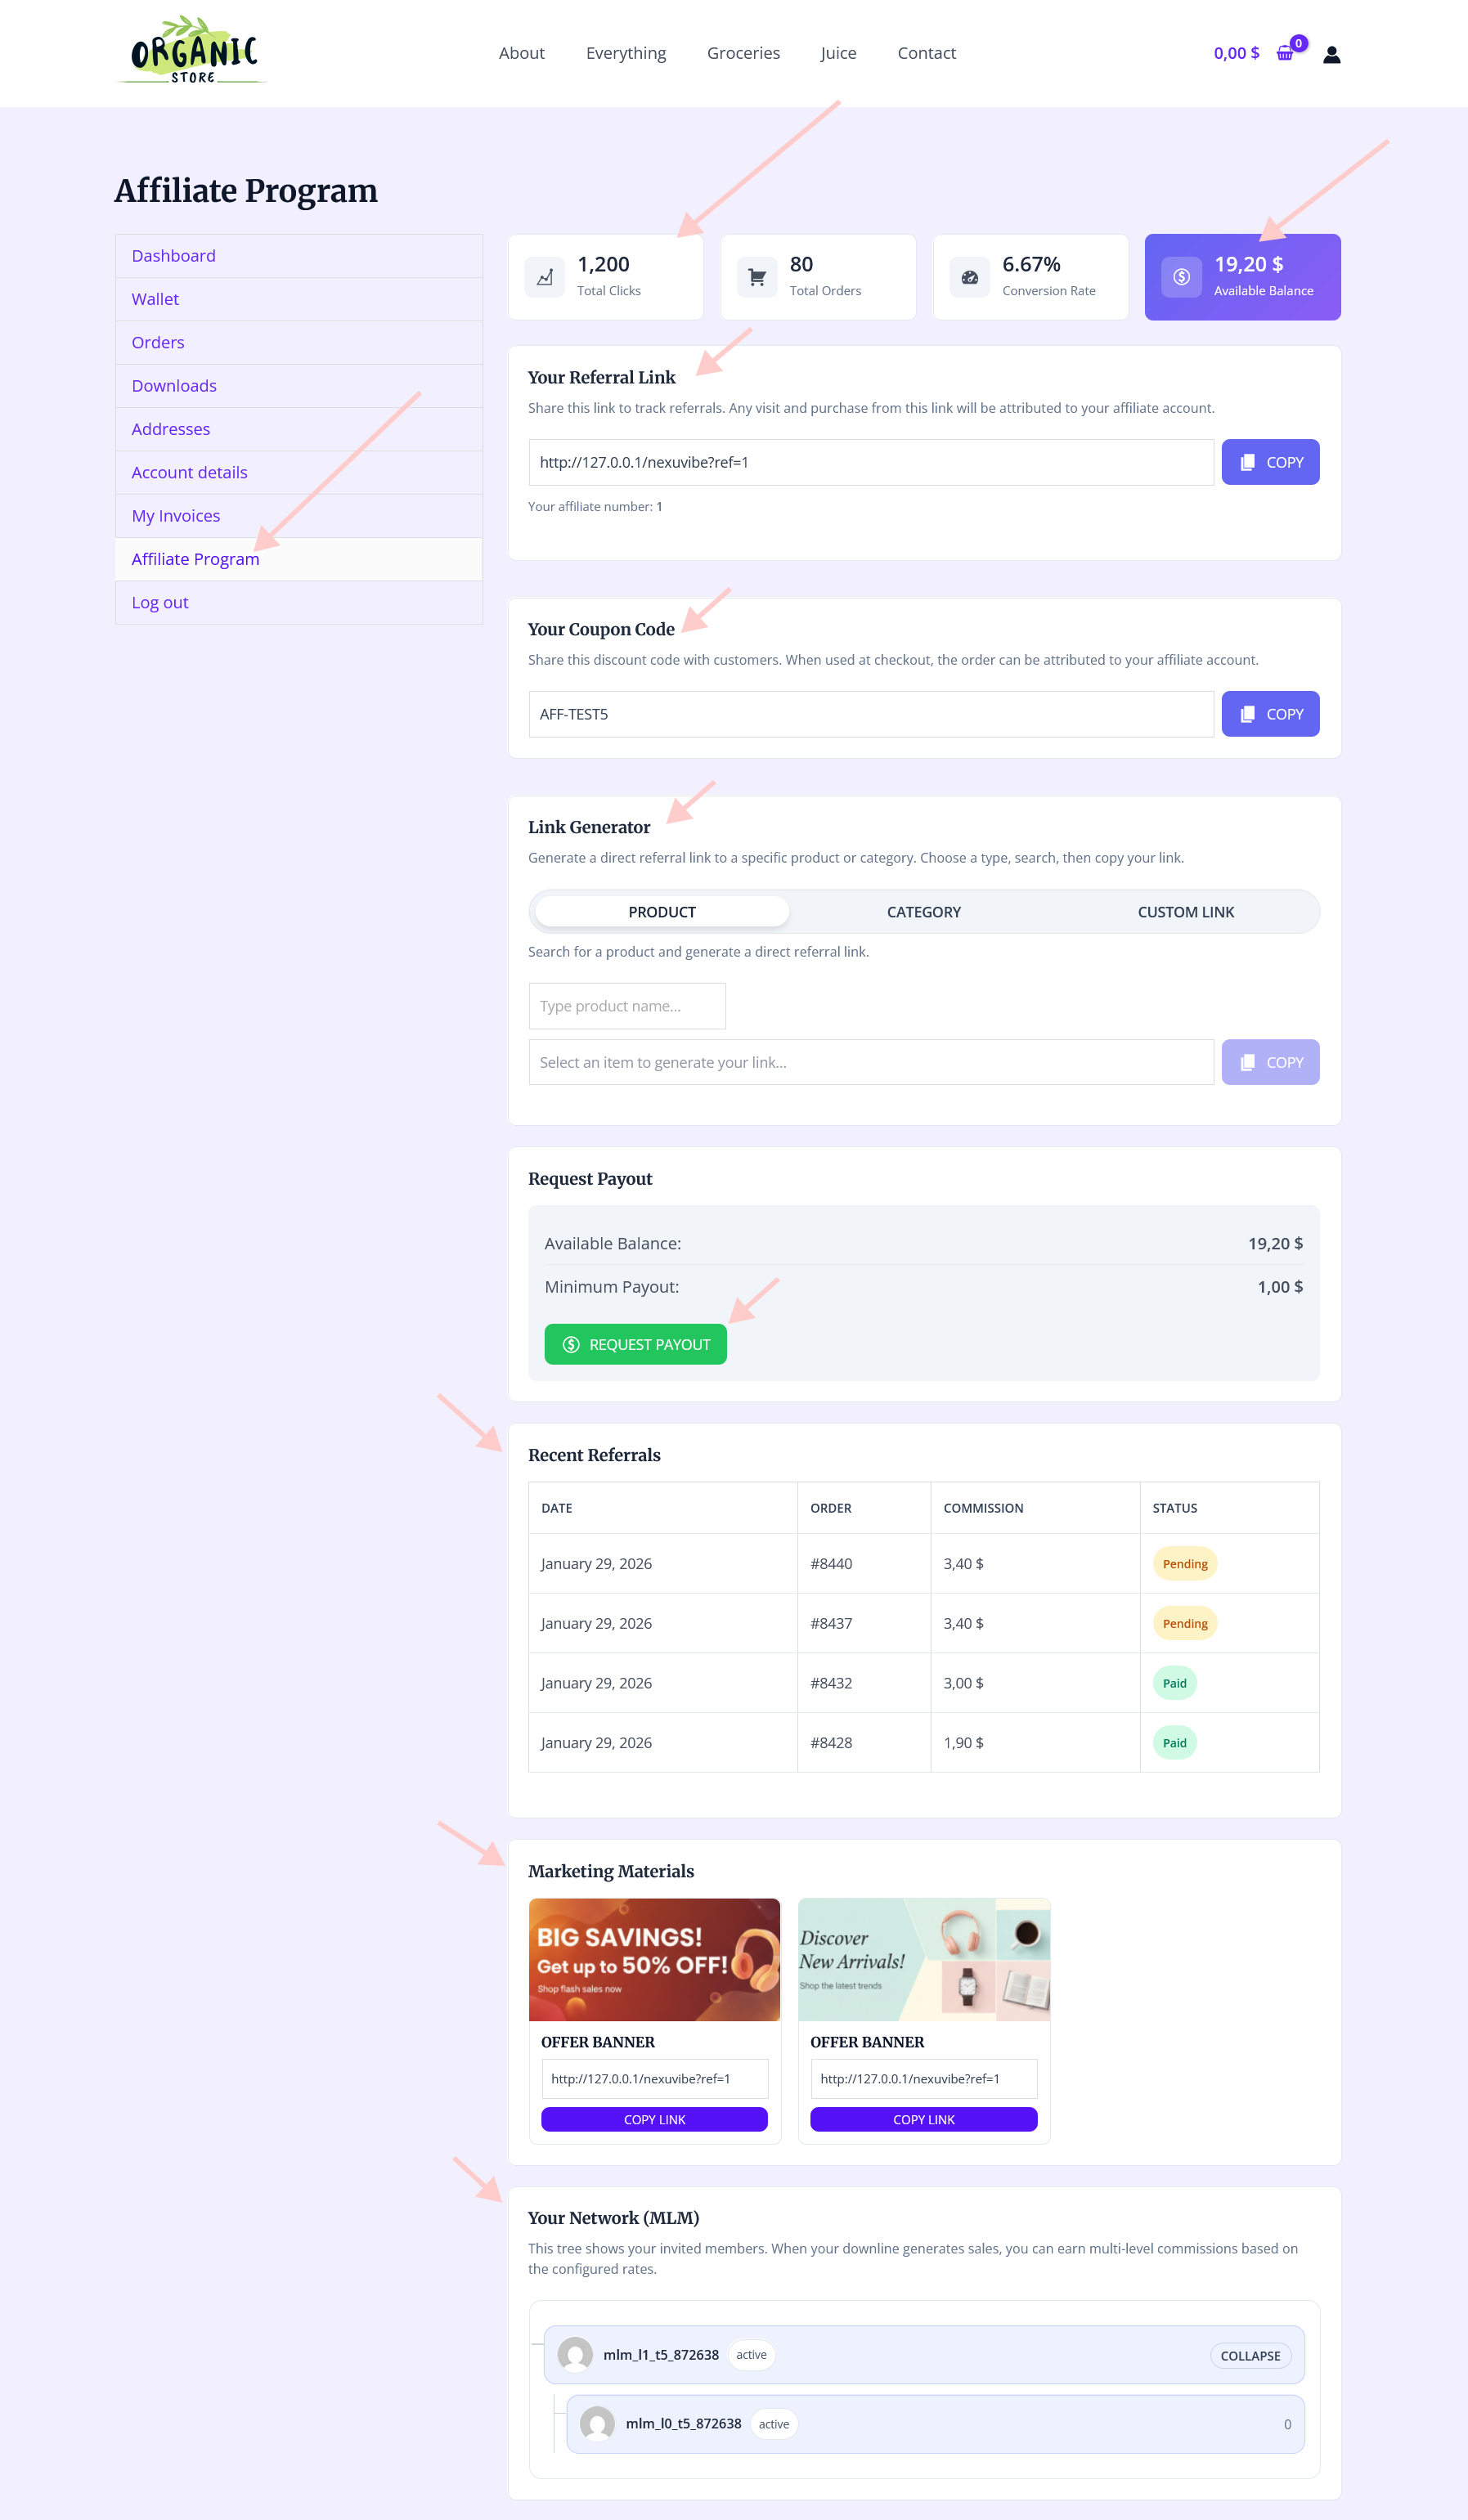
Test this by creating a test affiliate account, approving it, then logging into the store as that affiliate and navigating to My Account. The Affiliate tab or section should appear in the account navigation. If it does not appear, check whether your Elementor My Account customization is replacing the standard WooCommerce My Account shortcode with custom content — Affiliate Engine registers its My Account section via the standard WooCommerce account tabs filter, which requires the standard WooCommerce My Account shortcode to be present on the page.
Elementor affiliate program launch checklist
Elementor and WooCommerce affiliate programs are entirely compatible when the integration points described in this guide are handled correctly. The Elementor widget for the registration form, the caching configuration for tracking cookies, and the checkout template verification are the three steps that matter most. None of them are complex — they simply require knowing they exist and handling them before your first affiliate is active.
Affiliate Engine’s WooCommerce affiliate program plugin with Elementor integration provides the dedicated Elementor widget for form embedding, AJAX-based cookie setting compatible with all major caching plugins including those used in Elementor setups, and the complete affiliate management infrastructure — commission tracking, approval workflow, payout management, and affiliate dashboard — designed to work within the WooCommerce and Elementor ecosystem your store already runs on.
Add a fully integrated affiliate program to your Elementor WooCommerce store
Affiliate Engine includes a dedicated Elementor widget for the registration form, AJAX cookie setting for caching compatibility, and full WooCommerce checkout tracking — designed to work with the Elementor setup your store already uses.






Finally works without messing up my design.
Hey everyone, just had to leave a quick note about this guide. As someone who runs a high traffic WooCommerce store with Elementor Pro, I was always worried about breaking tracking when customizing pages like the order confirmation
Hey everyone! just had to leave a quick review because this guide saved me so much stress. I was worried about setting up an affiliate program on my Elementor site, but the step about configuring the core settings before building pages was a lifesaver. No more guessing or backtracking just clear instructions that actually worked. my registration form looks clean in that two column layout too. if you're using Elementor, don't skip this part!
Just a heads up for anyone using custom Elementor templates on their WooCommerce checkout page this guide seriously saved me hours of frustration. I swapped out the default checkout shortcode for my own design, and all of a sudden, affiliate tracking just stopped working. the part about checking the "Thank You" page template? Absolute lifesaver. My only tiny gripe is that the warning about it was kinda hidden in Step 2 I had to dig around a bit to even find it