Next-Level Code. Nexuvibe Style ...
Hrs
Min
Sec

Most WPML AI translation guides spend half their word count explaining what WPML is, why multilingual matters, and the history of machine translation. You already know all that. You have WPML installed. You have a site that needs translation. You want it working today, not after reading a 3,000-word background essay.
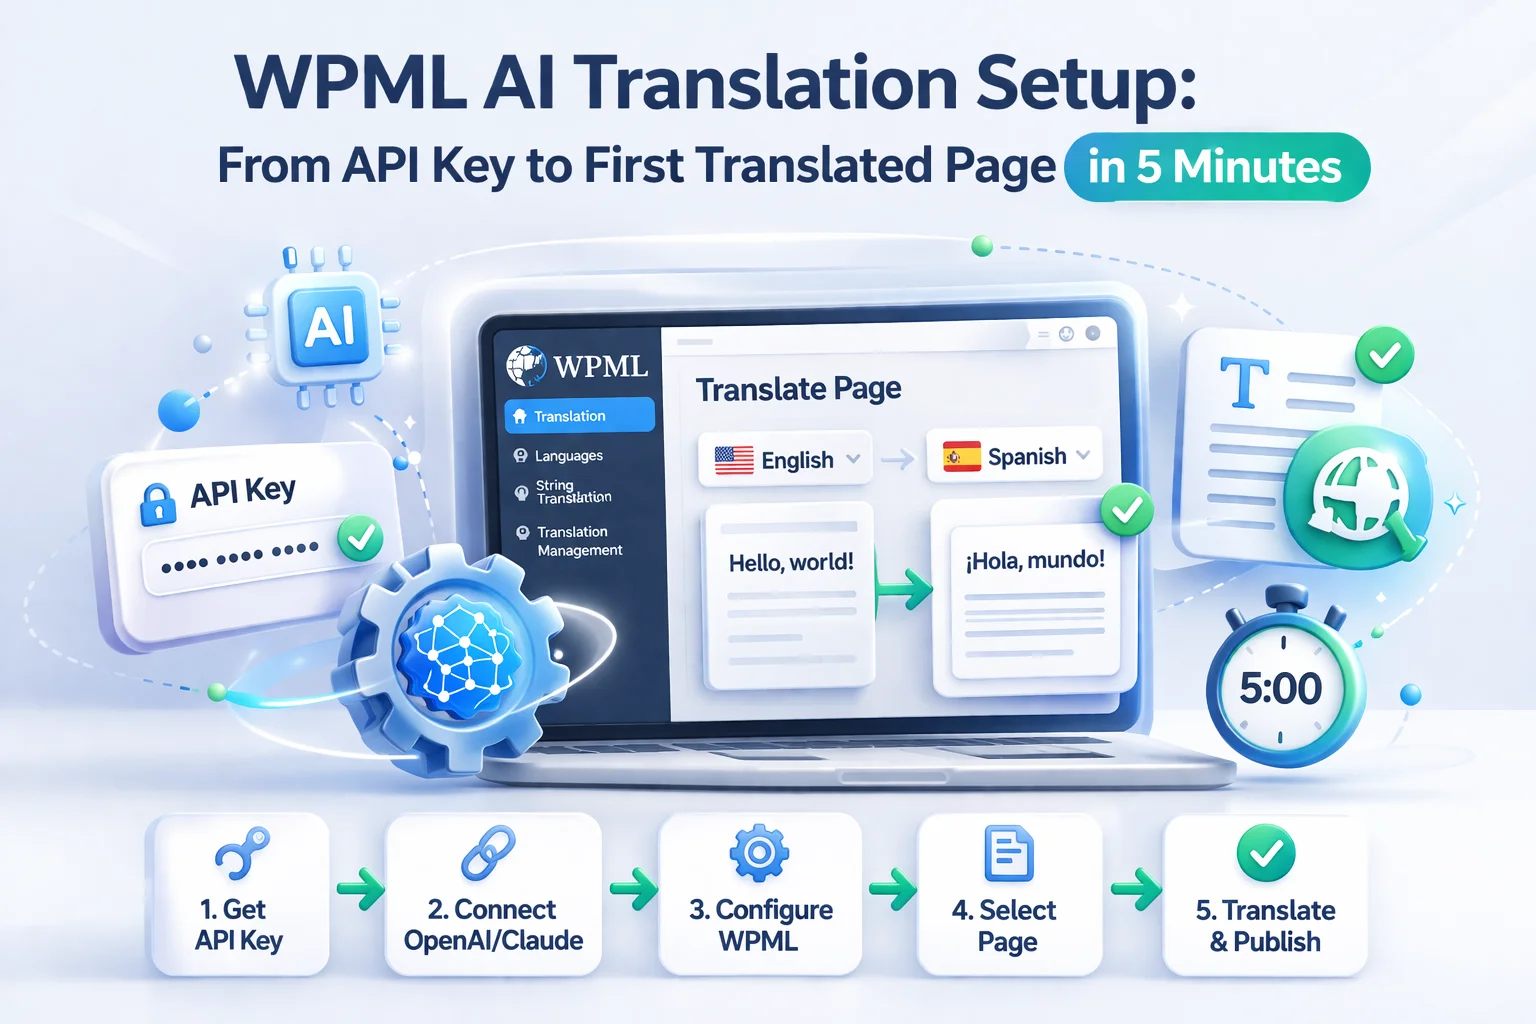
This is the fastest possible path from having nothing configured to seeing your first AI-translated page live on your WordPress site. Every step has a time estimate. The total is under five minutes if your WPML languages are already set up.
We are using NEXU AI Auto Translator for WPML for this walkthrough. It supports OpenAI, Claude, Mistral, and Grok, and it handles the entire translation workflow automatically in the background.
Confirm these three things are true before you begin. If any one is missing, handle it first. Trying to set up AI translation without these in place will waste your time.
Pick one AI provider to start with. You can switch later without any reconfiguration hassle. Here is where to get a key from each:
All providers require a credit card on file but only charge based on actual usage. Set a monthly spending limit of $10 to $20 as a safety net. For most sites, actual monthly costs stay well under $5.
Download the plugin from the NEXU WP website. In your WordPress dashboard, go to Plugins, then Add New, then Upload Plugin. Select the ZIP file and click Install Now. Activate.
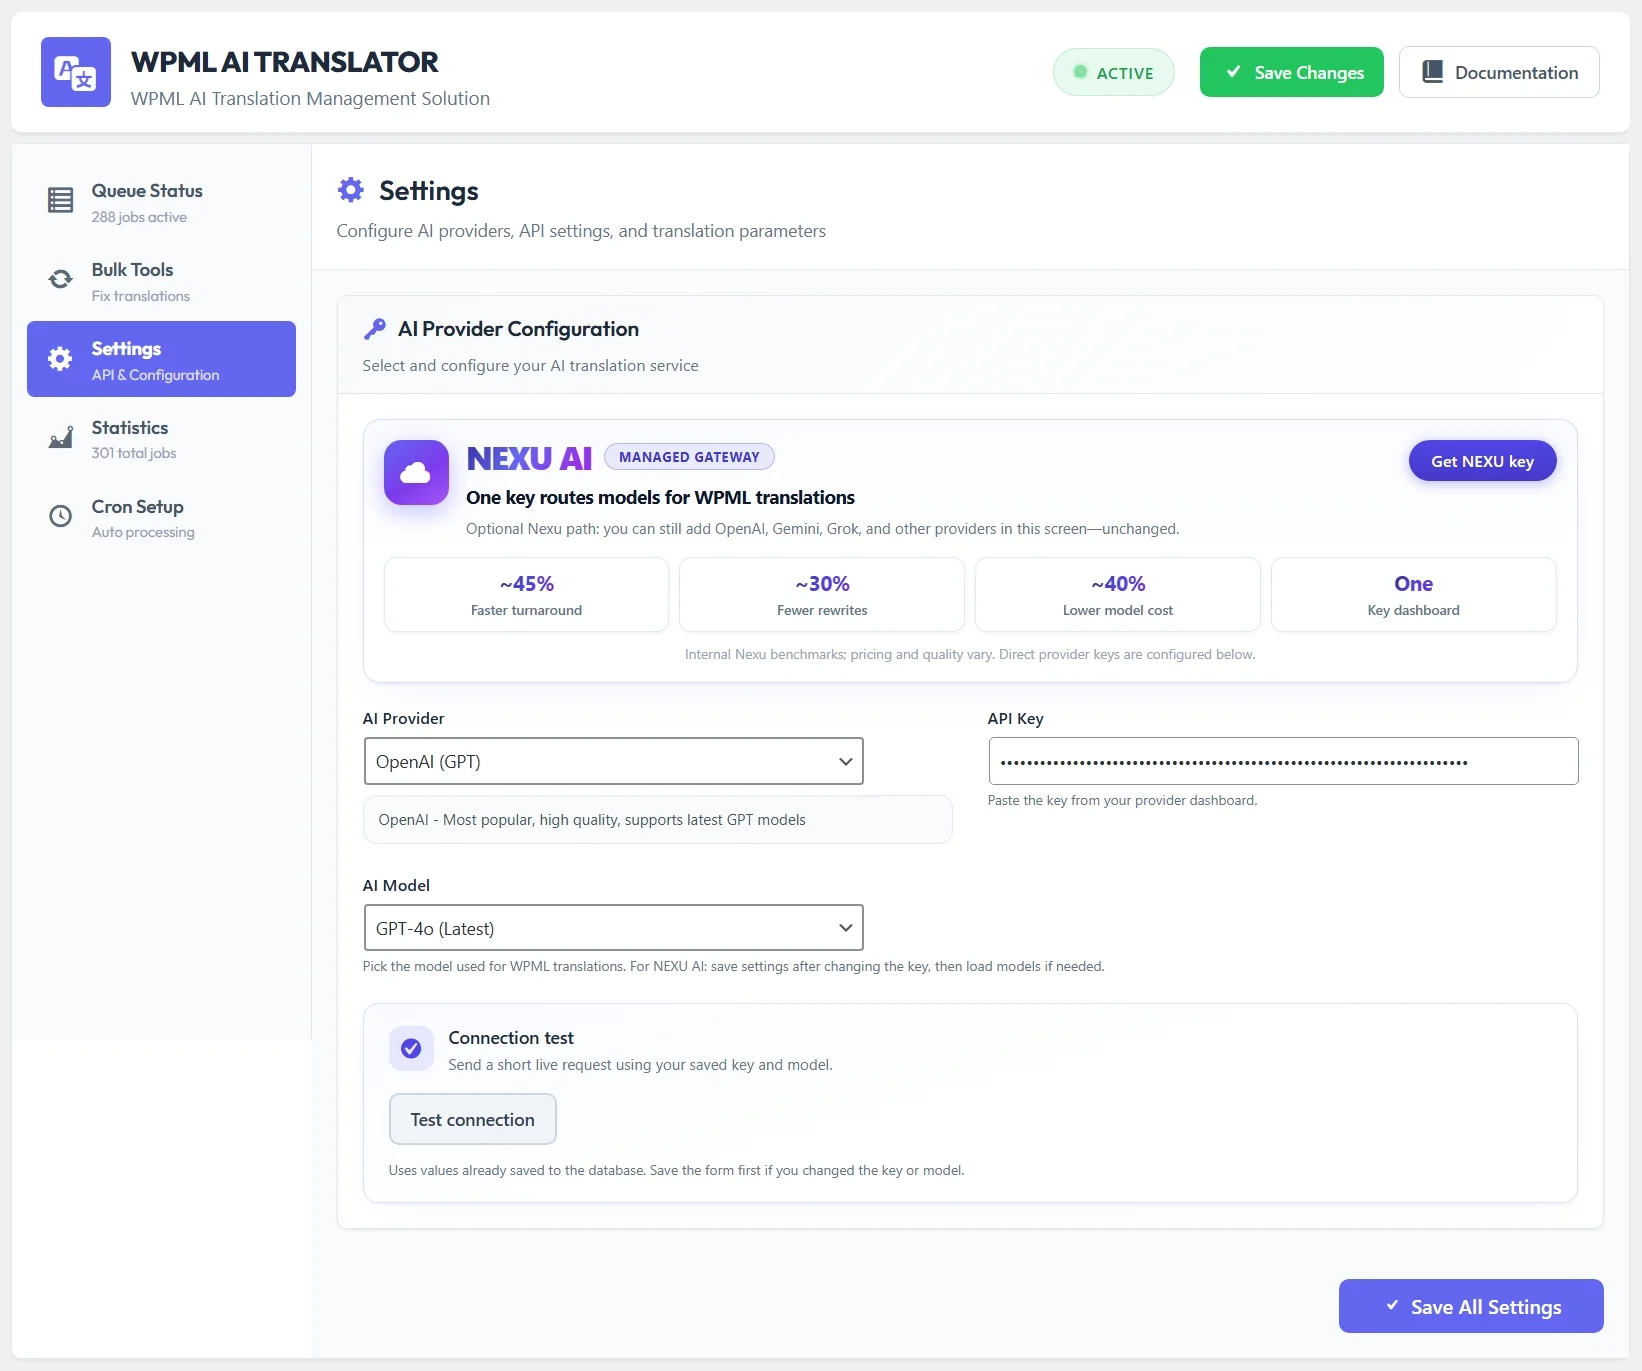
Navigate to the plugin’s settings page. You will see three things to configure:
Select OpenAI, Claude, Mistral, or Grok from the dropdown. This tells the plugin which API endpoint to use.
Paste the key you copied in the previous step. The plugin stores it securely in your WordPress database. It is never transmitted anywhere except to the AI provider’s API during translation requests.
Choose a model. For OpenAI, select GPT-4o. For Claude, select Sonnet 4.6. For Mistral, select Large. These are the best quality-to-cost options for translation in each provider’s lineup.
Click Save. The plugin tests the connection automatically. If you see a success confirmation, your AI translation pipeline is live. If you see an error, double-check that you copied the full API key and that your provider account has a payment method on file.
Go to WPML, then Translation Management, then Translators tab. You should see “AI Translator” listed as an available translator. It registers automatically when the plugin activates. If you do not see it, deactivate the plugin and reactivate it. WPML registers translators during activation, so a quick toggle resolves this in almost every case.
Stay in WPML Translation Management. Switch to the Translation Dashboard tab. You will see a list of your content with checkboxes. Find a post or page to translate. We recommend starting with something short, maybe a 500-word blog post, so you can see results quickly.
Check the box next to the content. Below the content list, select your target language or languages. In the translator dropdown for each language, select “AI Translator.” Click “Send all translation jobs.”
That is it. The job is now in the queue.
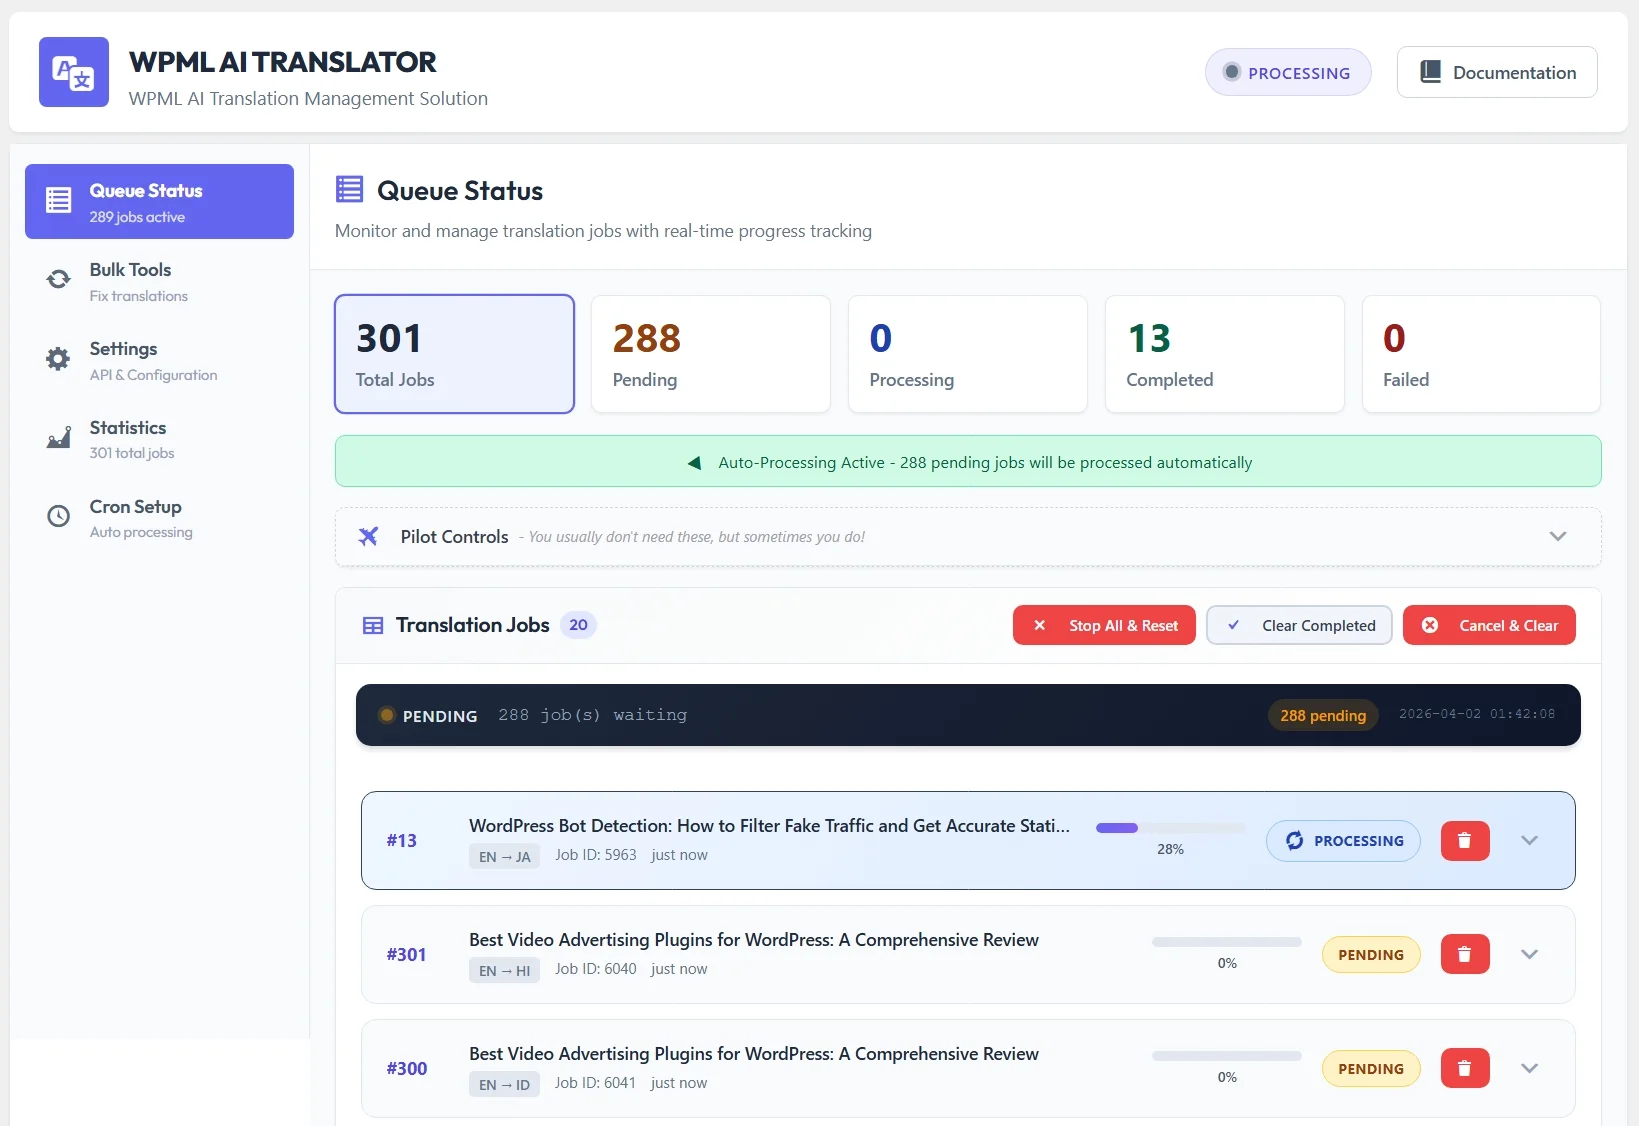
Navigate to the plugin’s queue status page. You will see your translation job listed with a status indicator. For a short post, the translation typically completes within 30 to 60 seconds. The page updates automatically so you can watch the progress in real time.
Once the status shows “Completed,” go to your site’s frontend. Use WPML’s language switcher to switch to the target language. Navigate to the post or page you translated. It should appear fully translated with all formatting, links, and images preserved from the original.
You now have a working AI translation pipeline. Every subsequent translation follows the same three-step process: select content in WPML, assign the AI translator, and send. The background processing handles everything else.
Your pipeline is working. Here is how to scale from one test page to a fully multilingual site without creating problems along the way.
Before committing to a full-site translation run, translate a small batch of different content types: a long blog post, a short one, a page with images, and a WooCommerce product if applicable. Review each to confirm the quality meets your standards and the formatting is preserved. This calibration step takes 10 minutes and saves you from discovering issues after translating 200 pages.
A translated page with an untranslated menu bar looks unprofessional. Use the plugin’s WPML string translation feature or WPML’s built-in String Translation to translate your navigation menu items, footer text, widget titles, and other interface strings. These are not page-level translations but site-wide strings that WPML manages separately.
If your site uses categories, tags, or WooCommerce product categories, translate those before translating the content that belongs to them. This ensures translated posts and products are correctly linked to translated categories. The plugin includes bulk tools for taxonomy translation that handle this quickly.
WPML Translation Management lets you select multiple items at once. Select 20 to 30 posts at a time, assign the AI translator, and send them. The plugin processes them sequentially in the background. Do not send your entire 500-post archive at once unless you are prepared to wait a few hours for it to complete. Batches of 20 to 50 are manageable and let you monitor quality as you go.
Once you have seen results from one provider, try another. Switch the AI provider in the plugin settings and translate the same test page again into the same language. Compare the outputs side by side. Different models have different strengths for different languages, and a five-minute test now can improve every translation you do going forward.
If something did not work on your first attempt, here are the three most common issues and their immediate fixes.
WordPress cron might not be firing. Visit any page on your site in a new browser tab. WordPress cron runs on page load, so visiting your site triggers the cron schedule. If the job starts processing after this, your cron is working but just needed a trigger. If it still does not start, check with your hosting provider about WP-Cron support.
Verify your API key is correct and complete. Some browsers cut off long strings when pasting. Delete the key from the settings field, carefully paste it again, and save. Also confirm your provider account has an active payment method. Some providers require billing to be set up before API access works, even on free tiers.
This usually means WPML has registered some content fields as “Copy” instead of “Translate” in its custom field settings. Go to WPML Settings, then Custom Fields Translation, and check that the relevant fields are set to “Translate.” This is most common with Yoast SEO meta fields and custom post type fields.
Five minutes ago you had a monolingual WordPress site. Now you have an automated AI translation pipeline that can translate any piece of content into any language your WPML setup supports. The hard part is already done. Everything from here is just repeating the same three-step process: select, assign, send.
The plugin handles everything in the background. Long articles get automatically chunked and reassembled. Elementor pages translate without breaking layouts. WooCommerce products translate with their SEO metadata included. Failed jobs retry automatically. You focus on your content. The translation happens around it.
If you have not grabbed the plugin yet, NEXU AI Auto Translator for WPML supports OpenAI, Claude, Mistral, and Grok from $39/year. The setup you just read about takes five minutes. The time it saves you over the next year is measured in hundreds of hours.
OpenAI, Claude, Mistral, Grok. Background processing. Elementor support. WooCommerce. Content chunking. $39/year.







Got it working fast
Hey, just used this to set up translations for a client's site. The 30 second checklist at the start was a lifesaver saved me from spinning my wheels when I realized their secondary language wasn't even configured yet. No fluff, just the steps you actually need. Got it running faster than I expected, but had to double check the API key part since it wasn't super clear where to paste it first try. Still, way better than most guides that bury the useful stuff.
Grabbed this for a friend who runs a small EMS training site and needed Spanish translations in a hurry. the instructions were spot on no extra fluff, just straightforward steps. they already had WPML set up with Spanish ready to go, plugged in their OpenAI key, and boom, the first page translated live in less than five minutes.
This guide looks promising for speed, but I've got a question before diving in. most plugins claim to work around it, but performance varies wildly. appreciate any real world insight